The Refractor OTA and the Focuser

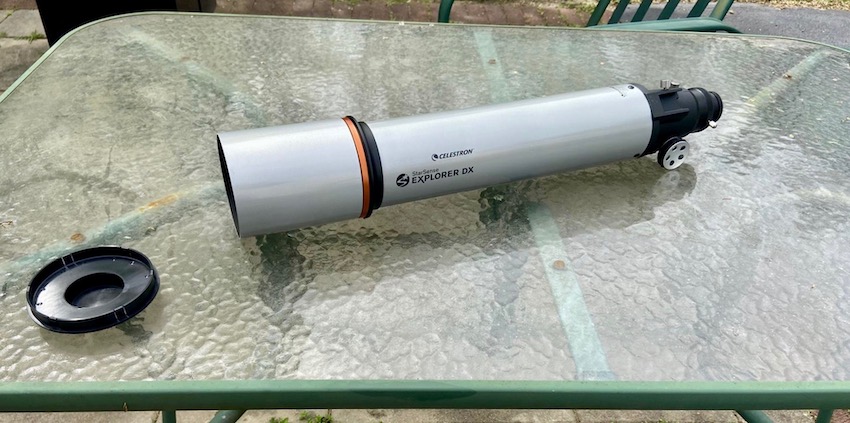
The DX 102’s optical tube is a 102mm f/6.5 refractor with a focal length of 650mm, the same as used on many other Celestron telescope/mount packages like the Omni 102 AZ and NexStar 102SLT. At this aperture and focal ratio, there is a fair amount of chromatic aberration, but sharp views of the Moon and planets are still possible.
The DX 102 has a 2” rack-and-pinion focuser, but it cannot actually balance on its mount with a 2” diagonal and eyepiece, so in practice, the scope is limited to 1.25” eyepieces and accessories only. Thankfully, even with 1.25” eyepieces, you can squeeze out a field of view of about 2.5 degrees with a 32mm Plossl or similar, so this should not be of huge concern to a beginner.
A Fair Alt-Azimuth Mount

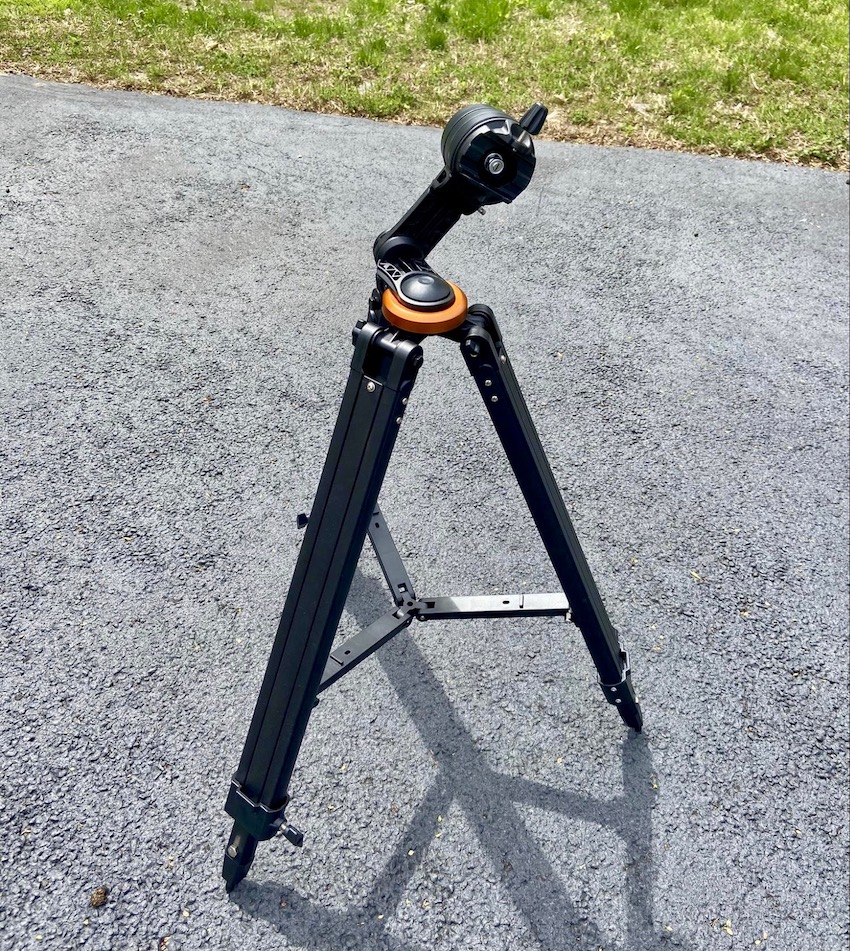
The StarSense Explorer DX mount is nothing more than a repainted Omni XLT AZ or “AZ3” mount with a bracket for the StarSense Explorer device. This mount is a little on the small side for either optical tube, but it works just fine.
It’s a simple aluminum-legged alt-azimuth mount with a pair of slow-motion controls for fine adjustments on both axes. That being said, I find the backlash from these slow-motion cables annoying when I’m using the scope at high magnifications. It’s also not as intuitive as a simple Dobsonian mount, for instance.
I appreciate the accessory tray; it’s a nice, sturdy component and an actual tray, unlike the silly eyepiece rack supplied with many scopes (which I have never understood the point of; it’s just a great way to get your eyepieces damaged and have them dew up faster).
One minor complaint about the mount, and one that bothered me especially with my sample: I couldn’t adjust the tension/friction on either axis without a socket wrench, and even then, it was very difficult. My mount came extremely overtightened to the point that I could not actually move the scope in altitude, and it took me a fair bit of strength, some disassembly of the mount and overall around half an hour of work to fix. Adjusting the azimuth axis involves just popping off a small plastic cover on the center of the mount and loosening/tightening the lock nut as needed with a socket wrench/screwdriver.
The StarSense Explorer Technology
At its core, the StarSense Explorer actually uses a relatively old technology known as plate-solving. In essence, what it does is take a snapshot of the sky and use computer algorithms to figure out where it is pointing. Normally, this is done for astrophotography to avoid performing a time-consuming GoTo alignment and is only used to find one target.
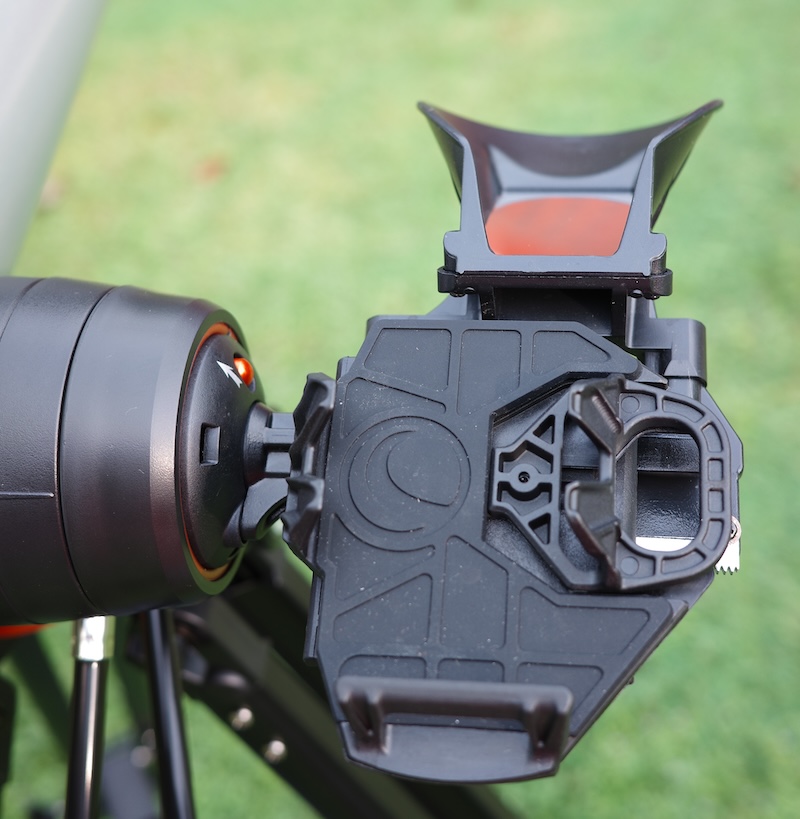
In principle, the StarSense Explorer tech is basically a bracket to point our phone at a small mirror that has been aligned to the telescope mount and then uses the phone’s onboard camera and processing power to plate-solve.

Because of our phone’s limited battery life, the StarSense Explorer technology can’t take a new picture of the sky every time we move the telescope. It would kill our phone quite fast. Instead, it uses plate-solving technology only when we first set up the telescope or when we move it across a significant portion of the sky. Other times, it tries its best to extrapolate finer movements using our phone’s relatively inaccurate gyroscope and accelerometer.
In practice, I’d say that this system is limited to an accuracy of about 0.25 degrees, or half the width of a full moon. Although this is much less precise than a real GoTo system with tracking, it is much simpler, easier, and more reliable than a motorised GoTo telescope.
The StarSense Explorer App & Interface
The StarSense Explorer app is ridiculously easy to set up. All I need to do is install the app, enter the unlock code that came with the telescope, and dock the phone to the telescope. The bracket fits most phones and works just fine even if I have a relatively thick case (or even a PopSocket, which I was shocked by). Once I undergo a super-simple alignment procedure, the StarSense Explorer app has thousands of objects it can find for me—the Moon, planets, most of the Messier catalog, and many more. Overall, I like it for what it does.
I’ve seen people on astronomy forums and contacting Celestron themselves, asking why the bracket and code cannot be sold as a stand-alone item. Celestron’s main explanation is that many beginners would buy the bracket and attempt to fit it onto substandard telescopes (or simply do it improperly) and become frustrated. I kind of agree with this sentiment.
I previously used to complain about the lack of targets in the app’s database, but Celestron has updated the app and drastically expanded its number of objects, greatly increasing its overall utility.nk in the scope optically, and replacing it might be a good idea. However, it’s enough to get you started.
Should I buy a used StarSense Explorer DX 102AZ?
A used StarSense Explorer scope will likely be missing the code for the app and many of the scopes floating around have had their phone brackets yanked off as well for use on other instruments. So unless you can be sure it has those or the price is absurdly low, we’d recommend you pass.
Alternative Recommendations
There are some other manuals as well as computerised scopes in the DX 102 AZ’s price range that you might want to take a look at:
- The StellaLyra 8”/Zhumell Z8/Orion SkyLine 8 has nearly double the aperture, significantly better accessories, and a simpler mount than the StarSense Explorer DX 102 AZ. You can actually buy digital setting circles/encoders such as the Romer Optics EZ Push To that basically emulates the StarSense Explorer setup with your phone.
- The Sky-Watcher Virtuoso 150P has more aperture than the DX 102 AZ but without the chromatic aberration and in an extremely compact package, with full GoTo and tracking operated by your smartphone along with the ability to be aimed manually. The all-manual Heritage 150P is identical but lacks electronics.
- The Celestron Astro-Fi 130 have a bit more aperture than the DX 102 AZ and will automatically aim around the sky via commands from your smartphone, and track objects without any manual adjustment. The Astro-Fi requires a full GoTo alignment to use and is mounted atop a tripod, while the Virtuoso is a tabletop scope but can be used manually with or without the electronics being switched on.
Aftermarket Accessory Recommendations
As mentioned earlier, the StarSense Explorer DX 102 AZ is provided with a cheap Amici prism. This prism’s “erect image” is, of course, unnecessary for astronomical use, while the diagonal is both cheaply made and optically compromised, choking the light path of the telescope and reducing sharpness and contrast. A high-quality prism star diagonal, such as the Celestron 94115-A Prism Star Diagonal, effectively eliminates all of the issues caused by the Amici prism supplied with this scope and is fairly affordable too.
Once you’ve upgraded your diagonal to one designed specifically for astronomical use, there are several eyepieces worth considering for the StarSense Explorer DX 102 AZ to complement the supplied pair of oculars. A 32mm Plossl eyepiece offers the widest possible true field achievable in a 1.25″ format eyepiece, approximately 2.6 degrees across at 20x magnification with the StarSense Explorer DX 102 AZ. In addition, a 6mm goldline or redline eyepiece provides 108x magnification, perfect for planetary viewing or splitting double stars and about the maximum magnification that you’ll find yourself wanting to use regularly with this telescope. If desired, you could also acquire a 15mm redline/goldline for 43x to fit between the stock 20mm and 10mm eyepieces for medium magnification.
One other accessory you might want to pick up for the StarSense Explorer DX 102 AZ is a quality UHC/OIII nebula filter. It doesn’t “filter out” light pollution but rather increases contrast on nebulae, making them appear brighter against the background and bringing out subtle detail. This filter works great with the StarSense Explorer DX102AZ, which under dark skies with a filter will show you huge swaths of nebula regions like the North America or Veil Nebula, for instance. Even under a dark sky, the UHC brings out more contrast by darkening the sky background.
What can you see with Explorer DX 102AZ?
The StarSense Explorer DX-102 is limited to brighter objects by the nature of its small aperture.
- The Moon looks pretty good, while Mercury and Venus show nothing besides their phases.
- Mars’ dark spots can be seen, although barely, when the planet is close to Earth, while its polar ice caps are a little more obvious.
- Jupiter’s cloud belts and the Great Red Spot are relatively easy to see, and you can just make out the disks of its four moons when they transit the planet.
- Saturn’s rings and the Cassini Division within them look fabulous, while its dimmer moons and cloud belts are a bit harder to spot.
- Uranus and Neptune are barely more than star-like dots, with blue disks barely bigger than the resolving limit of the telescope itself.
Deep-sky objects are a little less exciting.
Galaxies are almost certain to disappoint, as few will show detail under dark skies, and a beginner will struggle to see them all in light-polluted conditions.
Open star clusters look great and benefit from the 102AZ’s wide field of view, but globular star clusters are little more than fuzzy balls.
Particularly under dark skies, bright nebulae like Orion and the Lagoon look great, but planetary nebulae such as the Cat’s Eye are really too small and dim to be interesting in the DX 102.


